We set up and test a lot of Trimble GPS receivers here at Positioning Solutions. Recently one of new users asked us if we had a guide to connect their new TSC3 to their Trimble R8 GNSS Model 4 receiver.
To my surprise, my answer was no. Testing so many receivers over the years had become second nature to us, but after reviewing the process I realized that it would probably be helpful to new users of Trimble Access field software - especially for those currently using Survey Pro, SCS900 or whatever they might use across the pond.
How To Connect TSC3 to R-series Receivers Using Trimble Access
For this guide we used Access version 2017, but not much has changed since it was first introduced sometime back in 2006. Additionally, this is the same process for ALL Trimble GPS and GNSS receivers using Bluetooth, including R12, R10, R6, SPS881, SPS882, SPS985..etc
1. Turn on just the receiver that you want to connect to and make sure all others are off. This will make it easier to narrow down the list of available Bluetooth devices displayed on your TSC3. Also - make sure you are within 12 feet of the receiver for best results.
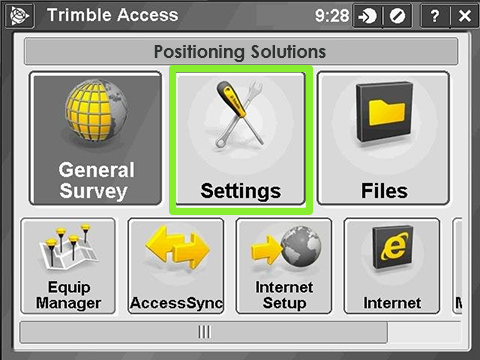
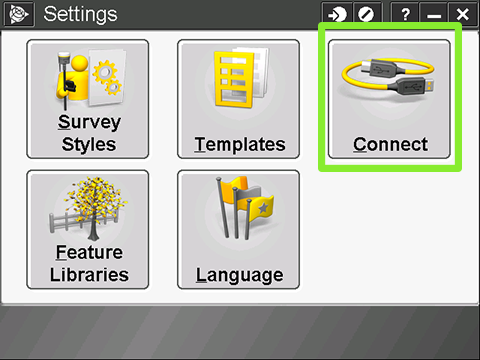
2. In Trimble Access, select Settings - then Connect
3. Connect
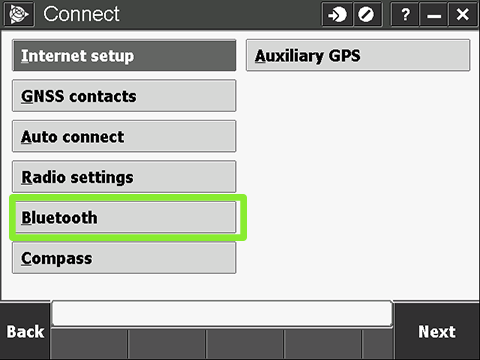
4. Select Bluetooth
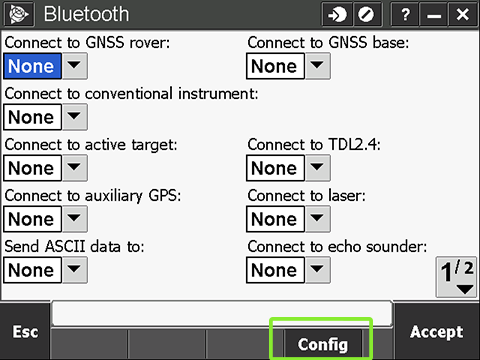
5. Select Config
6. Highlight Add new device, then select Add - Your TSC3 will begin searching for nearby devices.
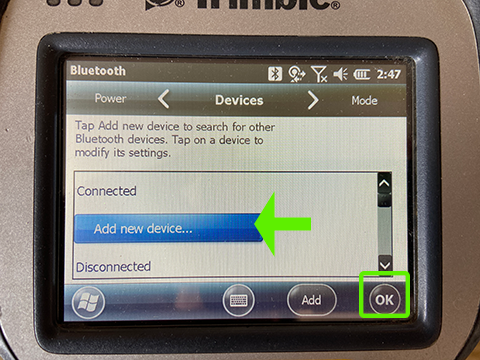
7. Select the receiver you are connecting to from the list - then OK.
If you don't see your receiver in the list - make sure it's powered on and within 12 feet of the TSC3 and search again.
8. Either skip the Passcode or enter Trimble's default: 0000
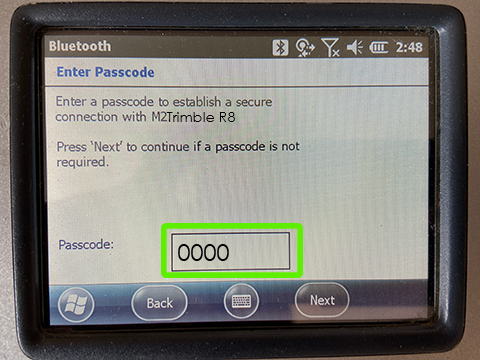
9. OK
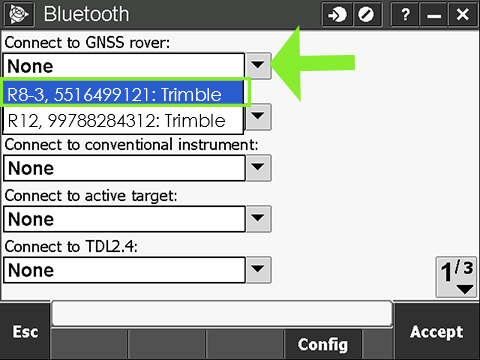
10. Open the drop down box for either Rover or Base and select the receiver we added in the previous step. In our example, we are assigning this receiver to be used as our Rover.
Later, when you're setting up in the field, Access will remember which receiver it should connect to, making setup's faster and less confusing.
11. Accept
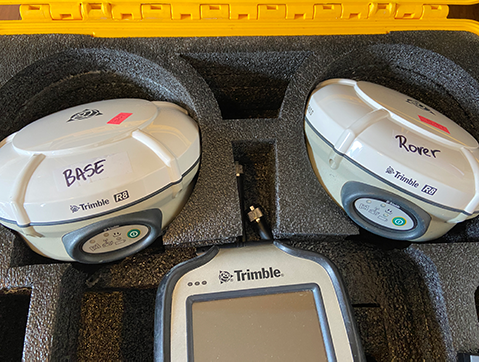
We also recommend labeling your receiver accordingly - i.e. "ROVER" and "BASE".
That's it. Repeat for additional receivers.
Next steps: Setting Up Your Receivers in Survey Styles (How-to guide coming soon).